
Ever looked at your beds after the first hard rain and wondered why the soil is splattered everywhere and weeds pop up overnight? Then, you should know mulch is the unsung hero of every tidy yard, yet many homeowners still wrestle with thin layers, wrong products, or back-breaking DIY runs to the big-box store. But mastering landscaping mulching can change that!
In this blog post, you’ll learn exactly how to mulch your backyard, including which mulch to choose and how much to order, and the precise. We’ll walk through cost-saving calculations, pro-level spreading techniques, and tricks for long-term color. Let’s dive in!
Why Mulch Matters
Stormy summers, salty breezes, and sandy soil make moisture retention a daily battle, especially in the Lowcountry. A proper blanket of mulch evens out soil temperatures, cuts watering needs, and boosts curb appeal in one swoop. These are the key benefits you’ll notice first:
- Weed suppression without chemical sprays
- Steadier soil moisture—less afternoon wilt
- A crisp, finished look that frames every plant
Gather Your Materials Before the Truck Arrives
A smooth project starts with the right prep. The following mini-checklist covers everything you need on-site when the mulch delivery pulls into your driveway:
1) Choose the Right Mulch Type
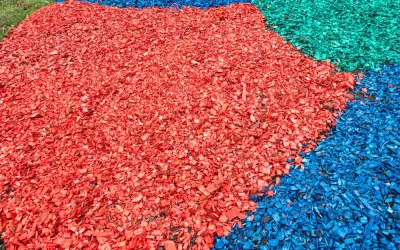
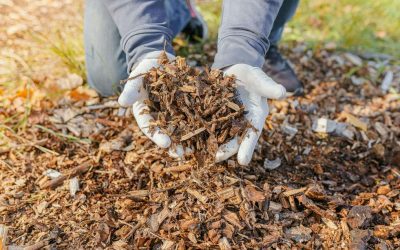
Pine, hardwood, dyed blends, and playground chips each offer unique perks. Pick pine for low-acid soils, hardwood for lasting color, and playground mulch where kids or pets dig. Quick tip: confirm that the supplier uses clean, pest-free stock.
2) Calculate the Perfect Volume
Measure every bed’s length and width, multiply for square footage, then divide by 12 to switch to cubic feet if you’re aiming for a 3-inch depth. Add 10% for odd corners so you never run short. An online calculator on your provider’s shop page does the math for you in seconds.
3) Order and Schedule Convenient Delivery
Choose a morning drop-off so you can spread before the afternoon heat. Local drivers know side streets and historic districts, so tight alleyways or oak-lined lanes won’t slow them down.
How to Mulch Your Backyard Like a Pro Step by Step-by-Step
Once the pile hits your driveway, rhythm is everything. Follow these steps if you truly want to master mulching without breaking a sweat:
1) Prep the Beds
Clear fallen leaves, rocks, and spent annuals. Loosen the top inch of soil with a hand fork to improve root penetration and eliminate crusting. A tidy base means mulch settles flat and won’t slide into sidewalks after rain.
2) Edge and Weed
Cut a crisp three-inch trench between lawn and bed with a flat-edge spade. This edge traps mulch, stops turf encroachment, and looks magazine-ready. Hand-pull visible weeds or spot-spray, then wait 24 hours before mulching to prevent seed spread.
3) Lay Fabric Where Necessary
If Bermuda grass or aggressive runners haunt your yard, landscape fabric under the mulch offers an extra barrier. Overlap seams by six inches and pin down securely. Skip fabric around perennials that self-seed—nature needs room to work.
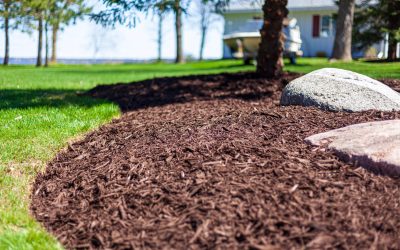
4) Spread Evenly, Layer Lightly
Shovel mulch into a wheelbarrow and tip small loads around plants. Use a plastic leaf rake or gloved hands to feather an even three-inch layer. Keep mulch at least two inches from trunks and stems to prevent rot. For tree rings, imagine a doughnut: mulch on the “dough,” bare soil in the “hole.”
5) Water to Lock It In
A gentle sprinkle settles fines, prevents wind scatter, and deepens color. Five minutes per bed is plenty. If you choose dyed mulch, let it cure dry for 24 hours before watering to avoid color runoff.
Maintenance Tips for Year-Round Color
Great mulch lasts, but a little upkeep keeps it looking freshly blown. Here are some quick seasonal maintenance tips:
- Every spring, fluff the surface with a rake to break crusts and revive color.
- After hurricane-season downpours, pull mulch back from trunks to dry bark.
- Top off once a year with a one-inch layer to replace what the soil microbes enjoyed.
Common Mulching Mistakes and How to Avoid Them
Even the most dedicated weekend warrior can stumble. Knowing the typical pitfalls helps you sidestep frustration:
Overmulching
A six-inch heap suffocates roots and invites fungi. Stick with three inches, four tops.
Volcano Mulching Trees
That pyramid of mulch against the trunk? It traps moisture, breeds pests, and can kill young live oaks. Always keep that doughnut shape.
Skipping the Math
Guessing volume leads to emergency store runs or a leftover mound on the driveway. Double-check calculations or let the online estimator handle it.
Make Mulching Effortless with Bella Mulch
You’ve learned what goes into great mulch coverage—now it’s time to make it easy on yourself. With Bella Mulch, you skip the heavy lifting and still get flawless results. Choose your mulch type, schedule delivery, and you can transform your yard without the hassle of multiple store runs or long weekends with a shovel.
Or if you prefer, you let us handle the mulch installation, too! Our blower-truck crews can cover every corner of your garden with precision, giving you even coverage, rich color, and a clean finish that lasts. Whether you’re refreshing a single bed or managing a full landscape, you get professional-grade results on your schedule.